In today’s digital world, a high-performing mouse is essential for efficient navigation, whether for work, gaming, or general computer use. Logitech mouse are popular for their advanced technology and ergonomic design, providing a comfortable and reliable experience for users. However, setting up a new mouse or resolving connectivity issues can sometimes be a challenge, especially if you are unfamiliar with the specific requirements and setup procedures.
This comprehensive guide will walk you through the process of connecting your Logitech mouse to your computer using a USB receiver. This process includes checking compatibility between the mouse and receiver, installing necessary software, and successfully pairing the mouse with your computer. By following these detailed instructions, you can ensure a smooth setup and optimal performance, paving the way for a more enjoyable and productive computing experience.
Like watching video on this topic? – see the video at the end of this article.
Step 1: Compatibility Check
The first step in connecting your Logitech mouse is to check the compatibility between the mouse and the USB receiver. Proper compatibility is essential to ensure your devices communicate effectively and without interruption.
Check the Receiver: Look at your USB receiver and check for a small orange or black snowflake symbol. This symbol indicates the receiver is designed to work with Logitech devices.
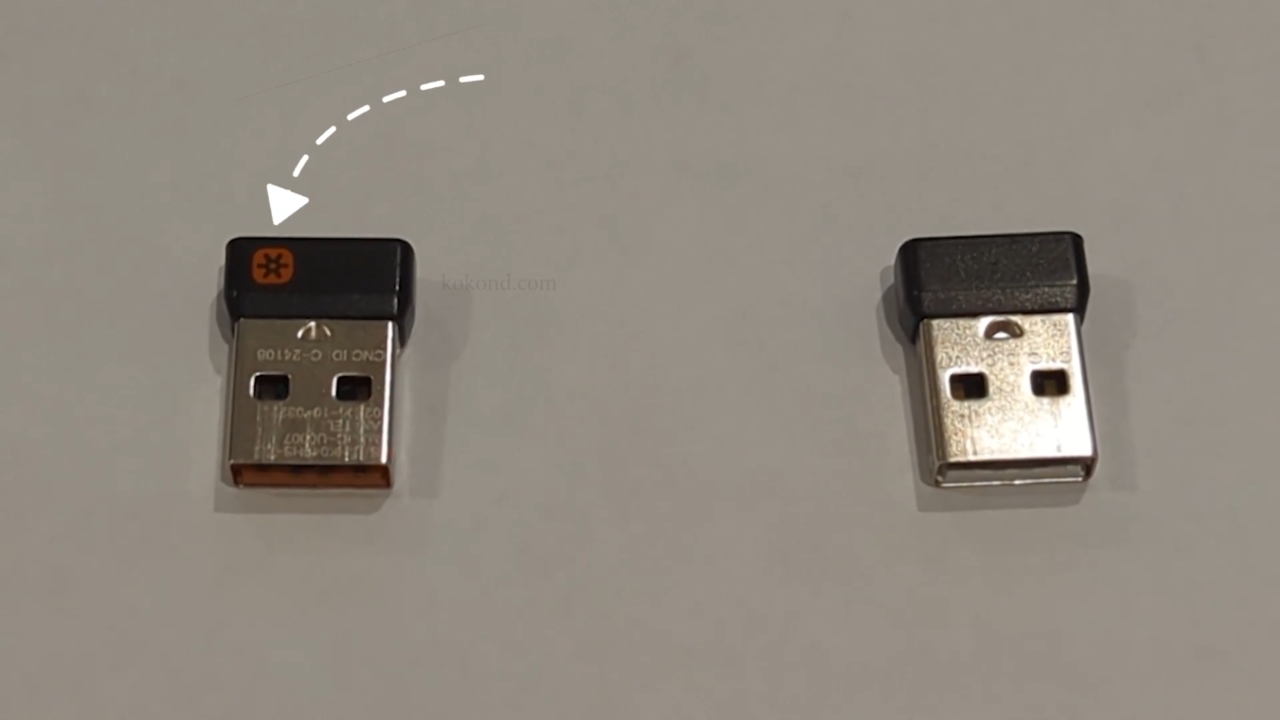
Assess Compatibility: If the receiver doesn’t have the snowflake symbol or a similar icon indicating compatibility with your mouse, there might be a compatibility issue. An incompatible receiver can lead to connectivity problems or non-functioning devices.
Purchase a New Receiver if Needed: If your current receiver is incompatible with your mouse, you may need to purchase a new one. Ensure you obtain a receiver that is designed to work specifically with your mouse model. Links to buy compatible receivers are often available in product descriptions, user manuals, or video guides.

By verifying the compatibility of your receiver and mouse, you can avoid potential issues and ensure a smooth connection between the two devices.
Step 2: Software Installation
Once you’ve confirmed compatibility, the next step is to install the necessary software to facilitate communication between your mouse and computer. This software is essential for proper mouse functioning and additional customization options.
Download the Software: Locate the software download link, often found in the product manual, video description, or on Logitech’s official website. Ensure you download the latest version of the software for compatibility and the best user experience.
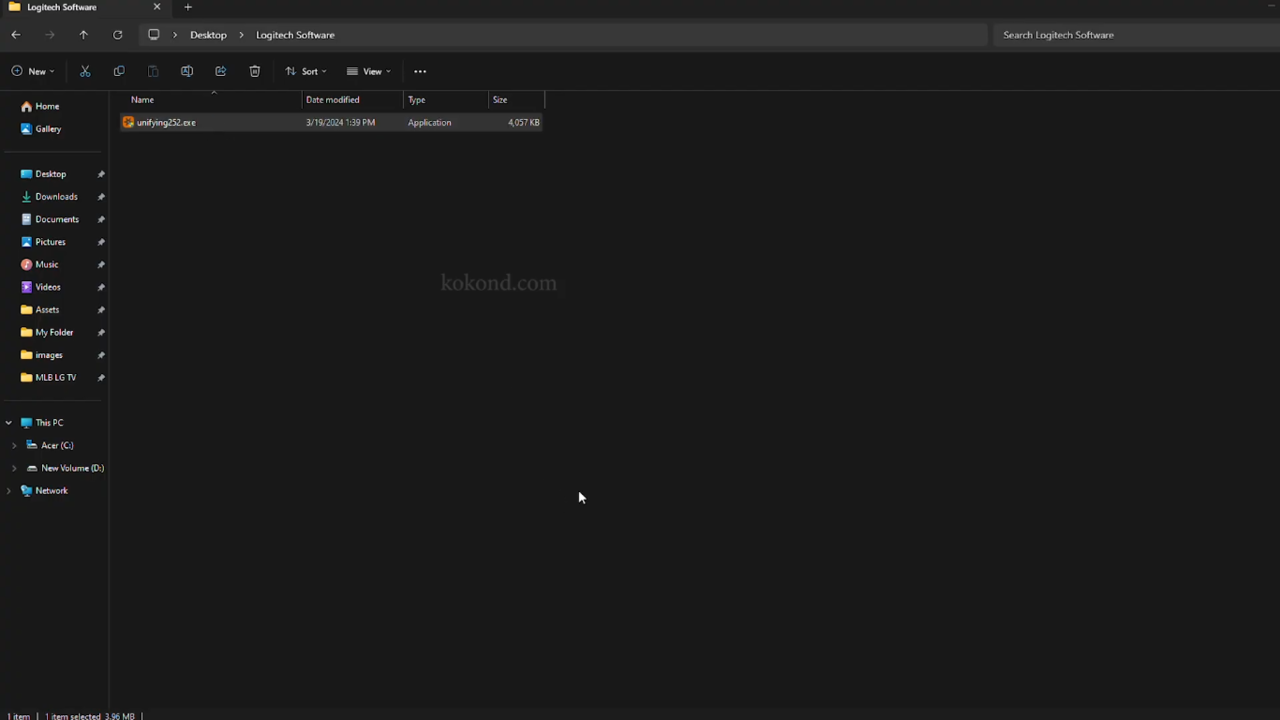
Follow On-Screen Instructions: After downloading the software, open the installer and follow the on-screen instructions to install it on your computer. This may include agreeing to terms and conditions and selecting installation settings such as the installation directory.

Check for Software Updates: After installation, check for software updates to keep the software up to date. Updated software provides you with the latest features and bug fixes, ensuring the best performance and compatibility.
Installing the necessary software will allow you to take full advantage of your mouse’s capabilities and customization features.
Step 3: Connect the Receiver and Mouse
With the software installed, it’s time to connect the receiver and your mouse.
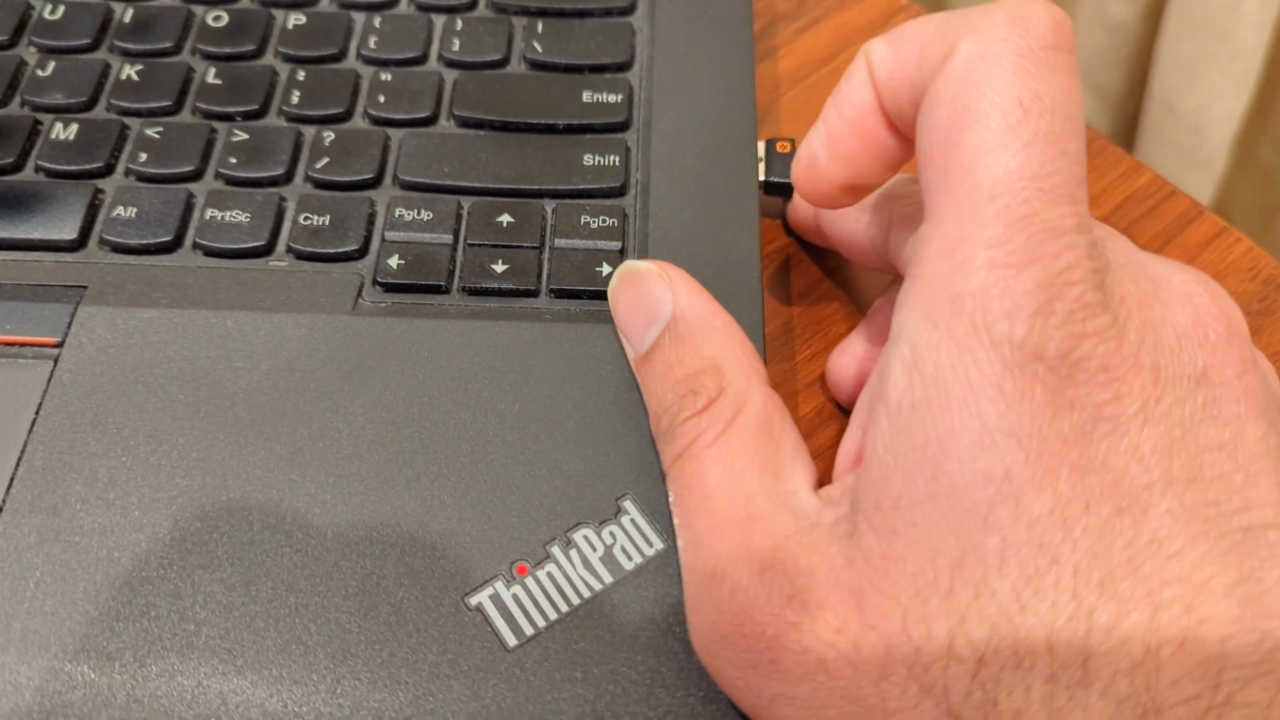
Plug in the Receiver: Locate an available USB port on your computer and securely plug in the receiver. Ensure the connection is stable and secure.
Software Detection: The software should automatically detect the receiver once it is plugged in. This process may take a moment depending on your computer’s speed and configuration.
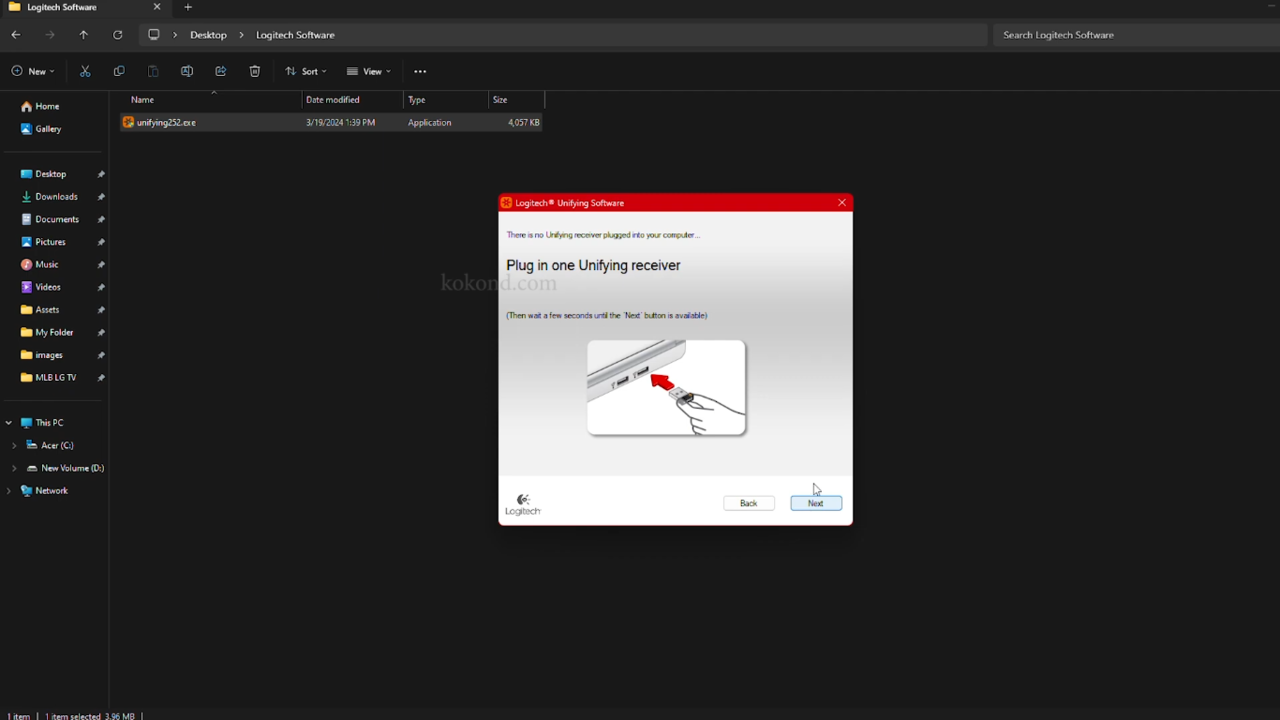
Follow Prompts: If the software prompts you to take any action, such as confirming the receiver connection or proceeding with the setup, follow the on-screen instructions to do so. Read each prompt carefully and respond as necessary.

Connecting the receiver properly is a crucial step in ensuring your mouse functions seamlessly with your computer.
Step 4: Pairing the Mouse
After connecting the receiver, the next step is to pair your Logitech mouse with the receiver and your computer. This step is essential for establishing communication between your mouse and the computer.
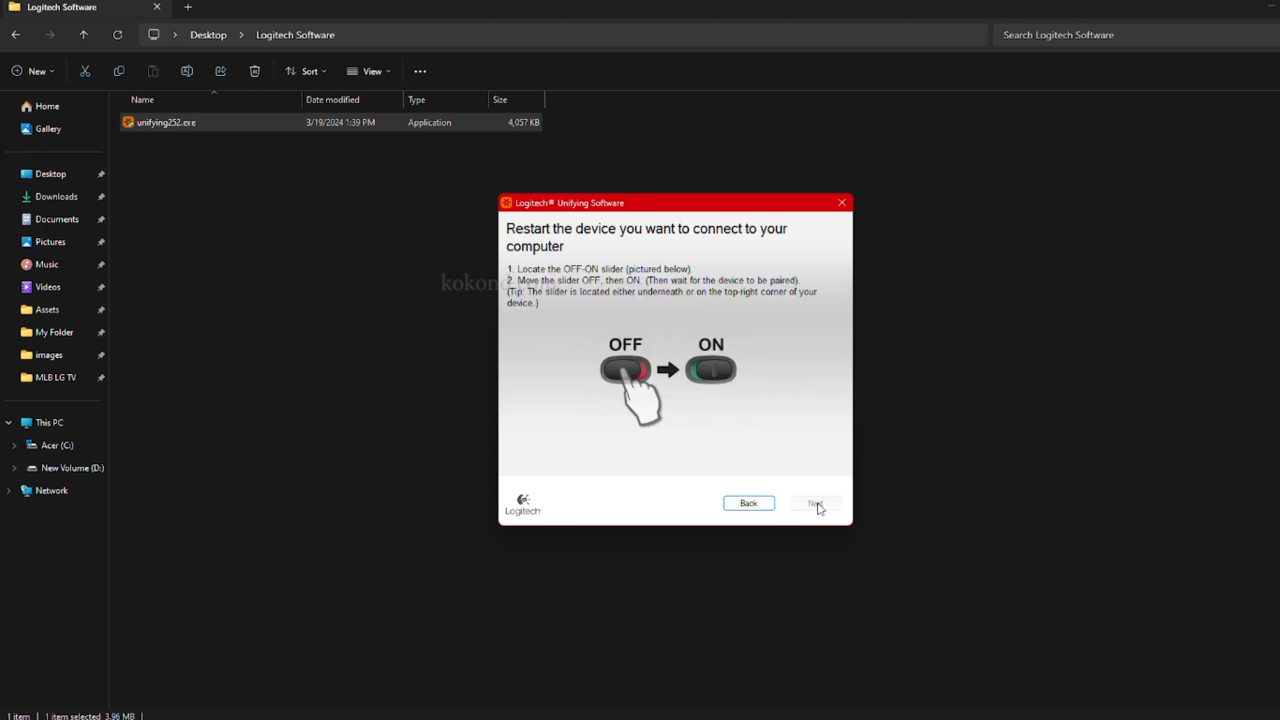
Turn Off the Mouse: Before beginning the pairing process, turn off your Logitech mouse. This allows the mouse to start with a fresh state when you turn it back on for pairing.
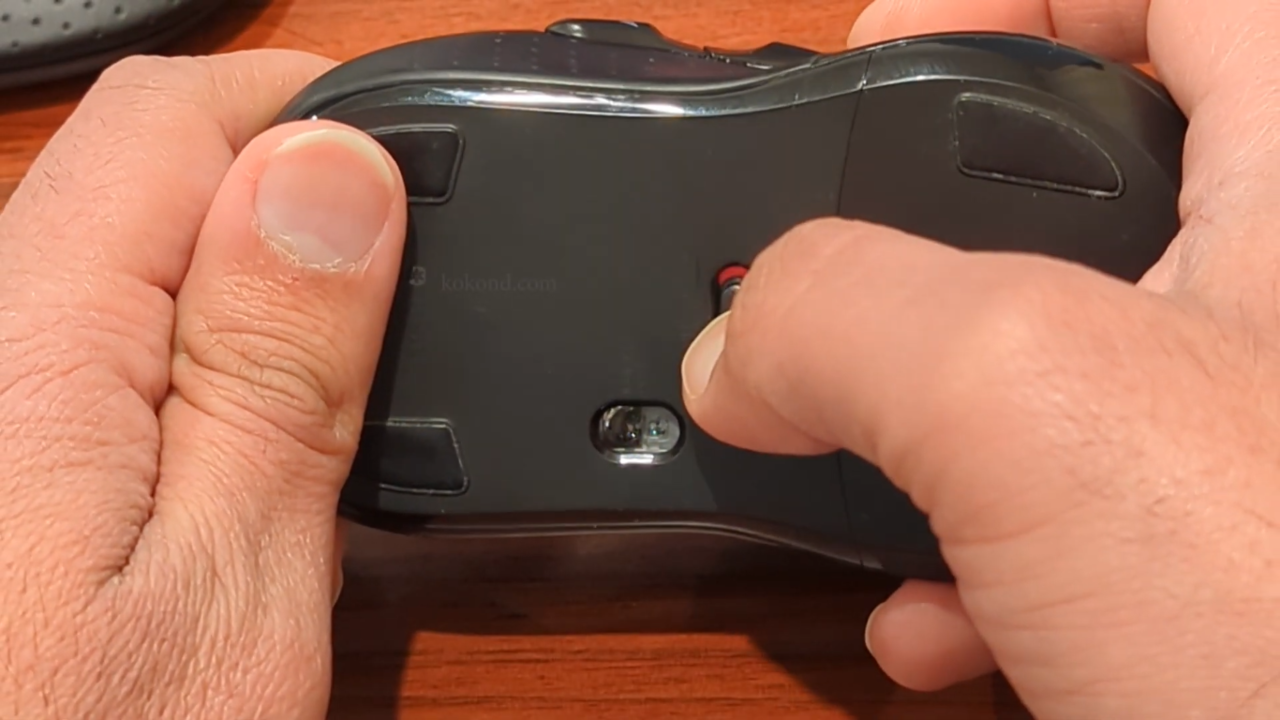
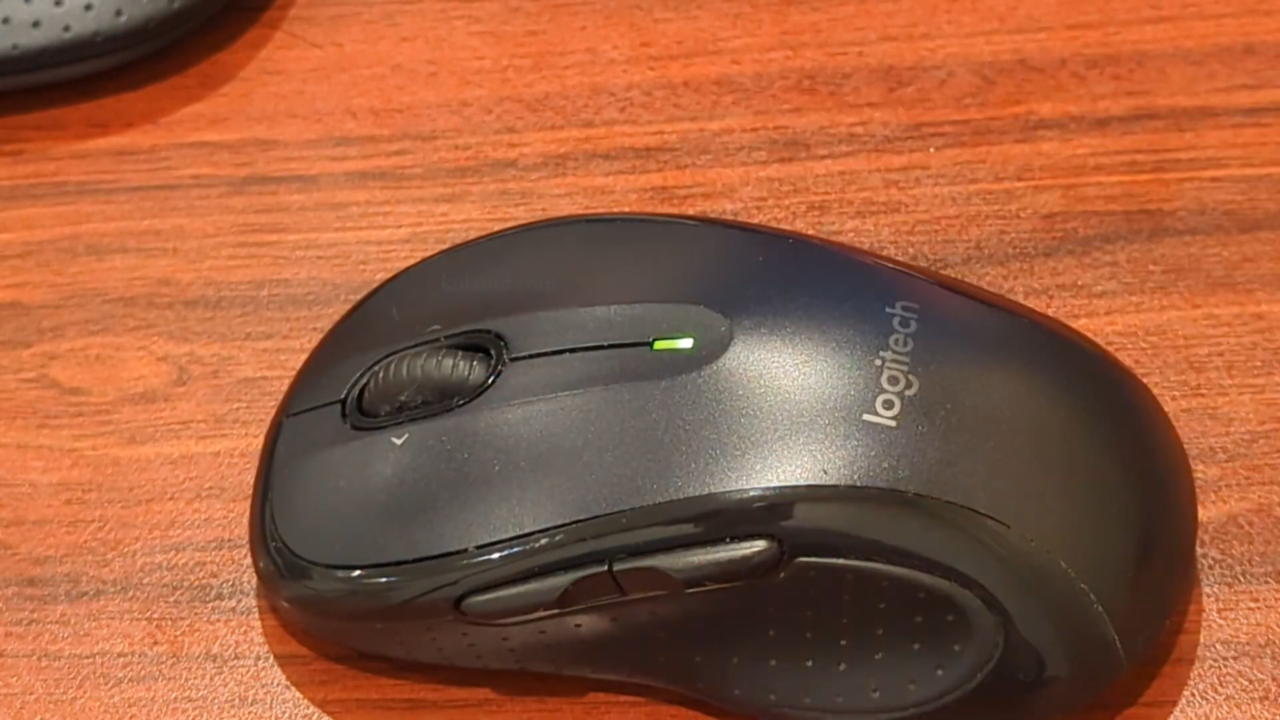
Power the Mouse Back On: Once your mouse is turned off, power it back on to initiate the pairing process. Make sure the receiver and mouse are in close proximity during this process.

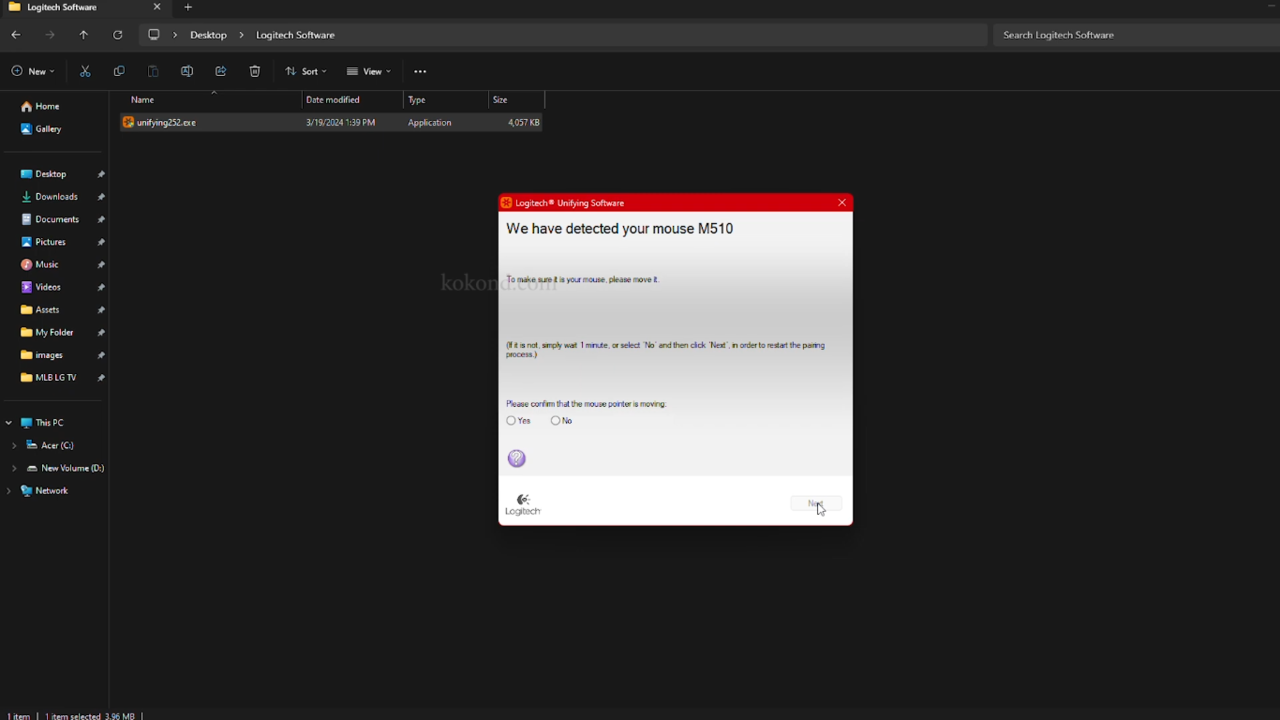
Wait for Software Recognition: Give the software some time to recognize your mouse. This can take a few moments, and you may see a notification or prompt once the software has successfully detected your mouse.
Confirm the Connection: Once your mouse is detected, you may be prompted to confirm the connection in the software interface. Follow any on-screen instructions, which may include pressing a button on your mouse to complete the pairing.
Pairing the mouse correctly with the receiver and your computer ensures smooth, uninterrupted functionality and a stable user experience.
Step 5: Finishing Up
The final step involves completing the setup process and ensuring your mouse is ready for use.
Click “Finish”: In the software interface, click “Finish” to complete the setup process. This may include additional instructions or adjustments specific to your mouse model.
Test the Mouse: Once the setup is complete, test your mouse to ensure it is working as expected. Check for smooth cursor movement, functional buttons, and other features such as scrolling or programmable buttons.
Adjust Settings: If needed, customize your mouse settings through the software to suit your preferences. Adjust sensitivity, button functions, and other features as necessary to enhance your user experience.
Congratulations: You’ve successfully connected your Logitech mouse to your computer via the USB receiver. Your mouse is now ready for use and should function optimally.

Frequently Asked Questions
How do I know if my Logitech mouse is compatible with the receiver?
Check your USB receiver for a small orange or black snowflake symbol. This symbol indicates compatibility with Logitech devices. If your receiver doesn’t have this symbol, check your mouse’s user manual or Logitech’s website to find the appropriate compatible receiver.
What should I do if my mouse isn’t being detected by the software?
Ensure the receiver is securely plugged into your computer and your mouse is powered on. Try restarting your computer and turning the mouse off and on. If the issue persists, check for software updates or reinstall the software.
Can I customize the settings of my Logitech mouse?
Yes, you can customize your Logitech mouse settings through the software installed on your computer. This includes adjusting sensitivity, button functions, and other features according to your preferences.
How can I troubleshoot connectivity issues between my mouse and receiver?
Start by checking the distance between your mouse and receiver to ensure they are within range. Avoid placing obstacles between them that may interfere with the signal. Additionally, try different USB ports and restart your computer. If problems persist, contact Logitech support for further assistance.
Conclusion
By successfully connecting your Logitech mouse to your computer using a USB receiver, you enhance your digital experience and productivity. Following the outlined steps ensures a smooth setup and optimal connection, allowing you to enjoy all the features and benefits of your Logitech mouse.
Properly setting up your mouse can lead to improved navigation, precision, and control, extending the longevity of your device and providing a comfortable user experience. If you encounter further challenges, Logitech support is available for assistance. Investing time in setting up your mouse correctly pays off with a more productive and enjoyable computing experience.
By taking full advantage of your mouse’s additional features and customization options, you can maximize efficiency and satisfaction in all your digital activities. As you become more familiar with your Logitech mouse and its potential, you’ll discover new ways to tailor the device to your needs, further enhancing your digital journey.
Video

Passionate about tech gadgets, I turned my love into a blogging journey. Specializing in how-to articles, I unravel the intricacies of gadgets, providing step-by-step guides. Join me in exploring the tech universe, where every device holds endless possibilities. Let’s simplify the complexities and enhance your tech experience together.