One of the most useful features of the Fire Stick is the ability to enable ADB (Android Debug Bridge) debugging. This feature is intended for developers, but can also be useful for troubleshooting and customizing the device. In this article, we will walk you through the steps of enabling ADB debugging on your Fire TV Stick.
Step 1 : Switch the Fire TV Device “ON”
Before we begin the process of enabling ADB debugging, make sure your Fire TV Device is turned on. Once the device is “ON”, you will be able to access the “Home Page”.
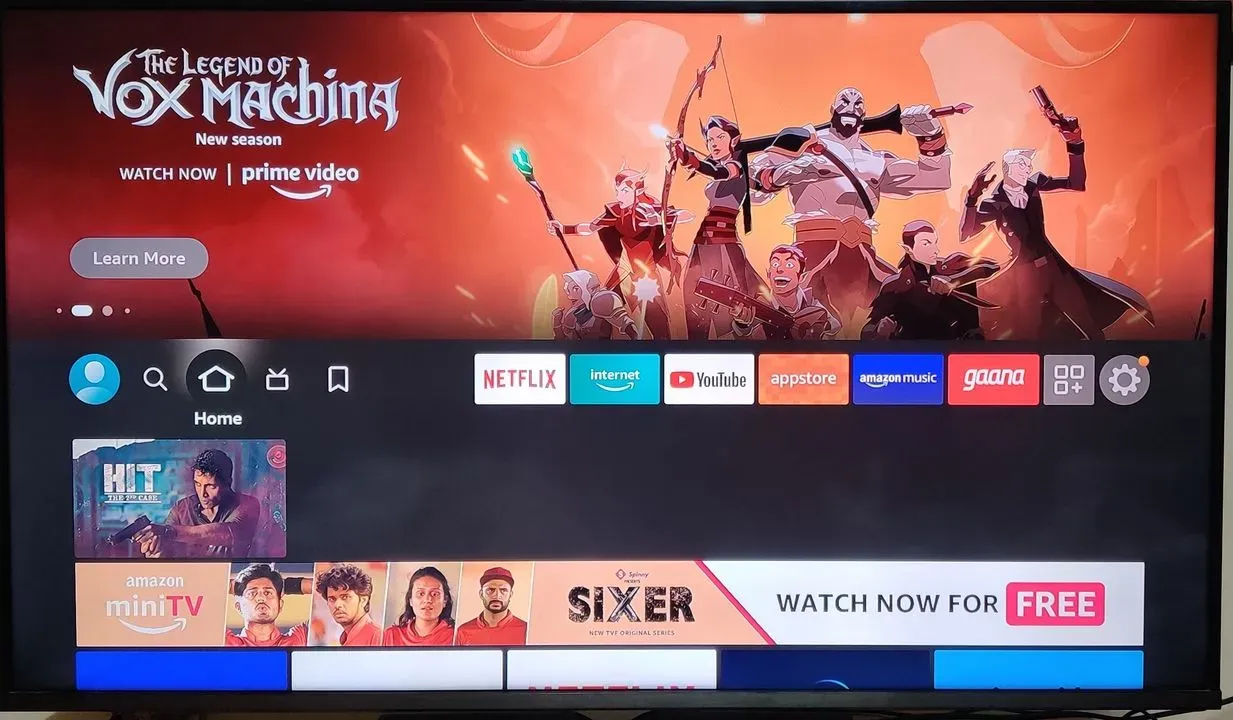
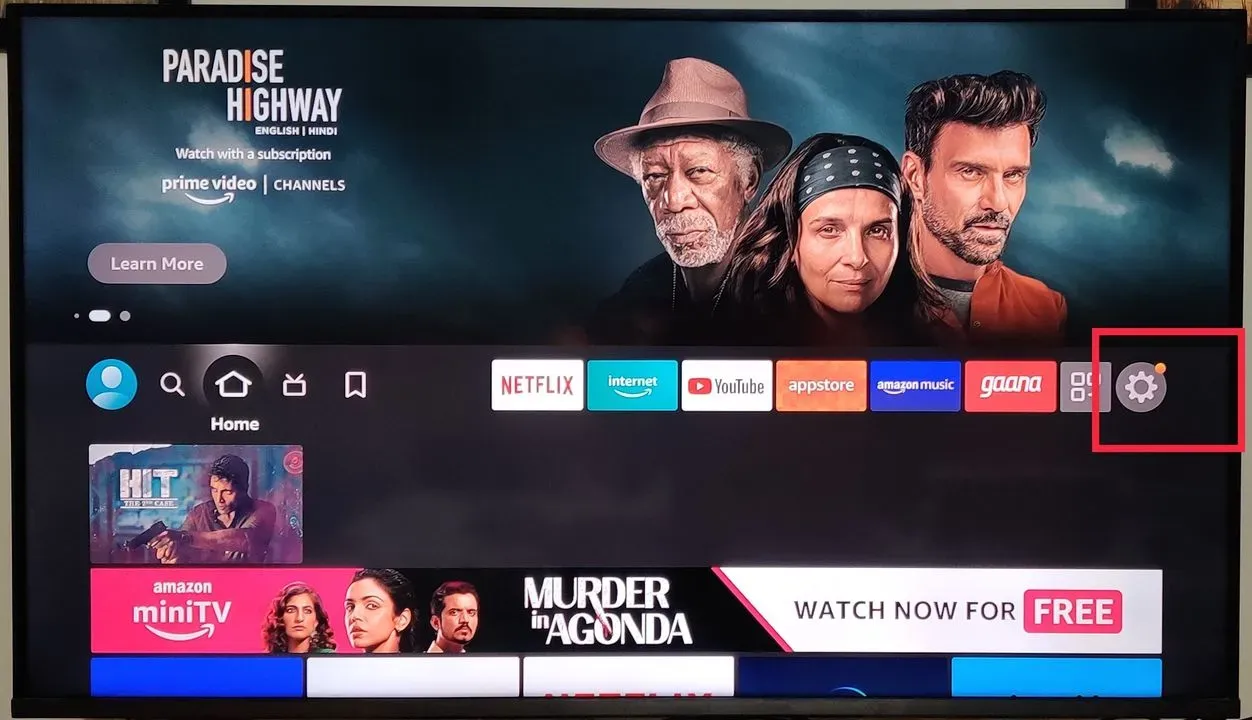
Step 2 : Access the “Settings” tab from the Home Page
Once you are at the Home Page, locate and select the “Settings” icon, it may be located on the top of the screen or in the main menu.
Alternatively, you can also use the Alexa Voice Remote to access the settings menu. Just press and hold the microphone button on the remote and say “Open Settings” and the settings menu will open up.
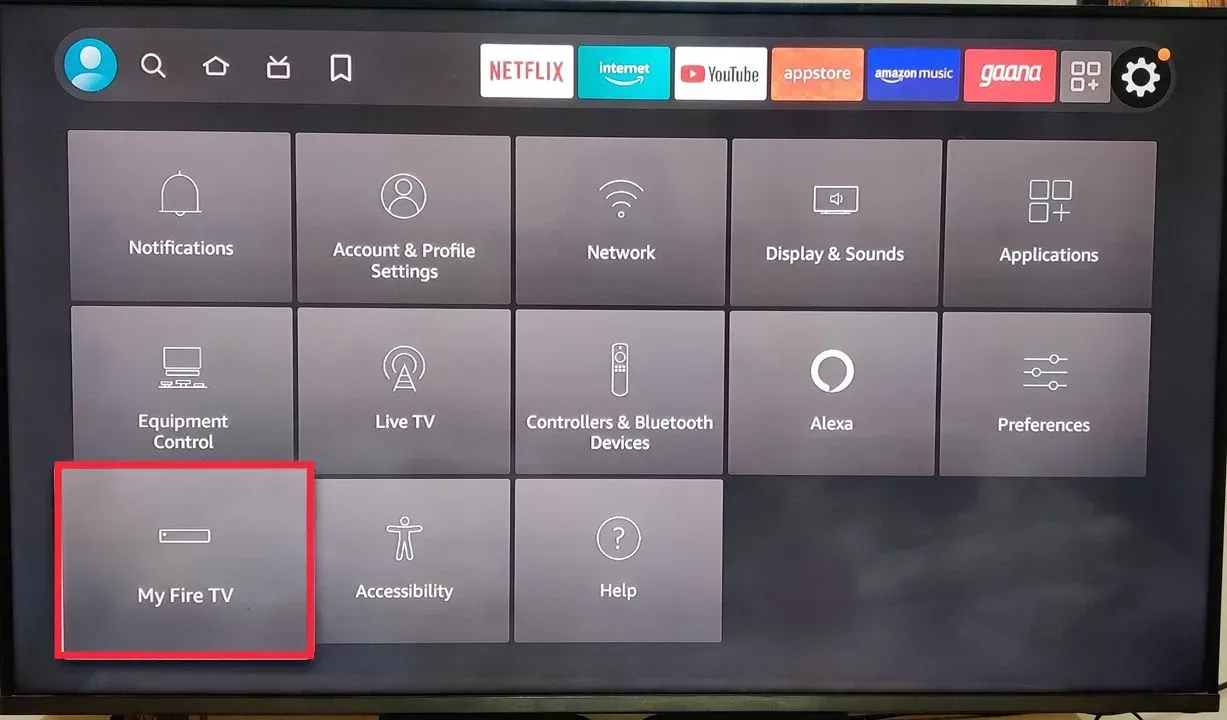
Step 3 : Select “My Fire TV” from the setting options
Clicking the “Settings” tab will enable you to multiple setting options. Navigate through these options to find “My Fire TV” and click “Okay” on your Fire TV remote to select it.
Step 4 : Choose “About” Tab from the options
You will now be able access “My Fire TV” setting options.
Earlier, these options also consisted of the “Developer options” tab, which enabled users to directly access “ADB debugging” settings. Amazon, in their recent update, removed the “Developer options” feature from the settings menu on Fire TV devices.
However, you can get this option back on your Fire TV device. Read on to know how.
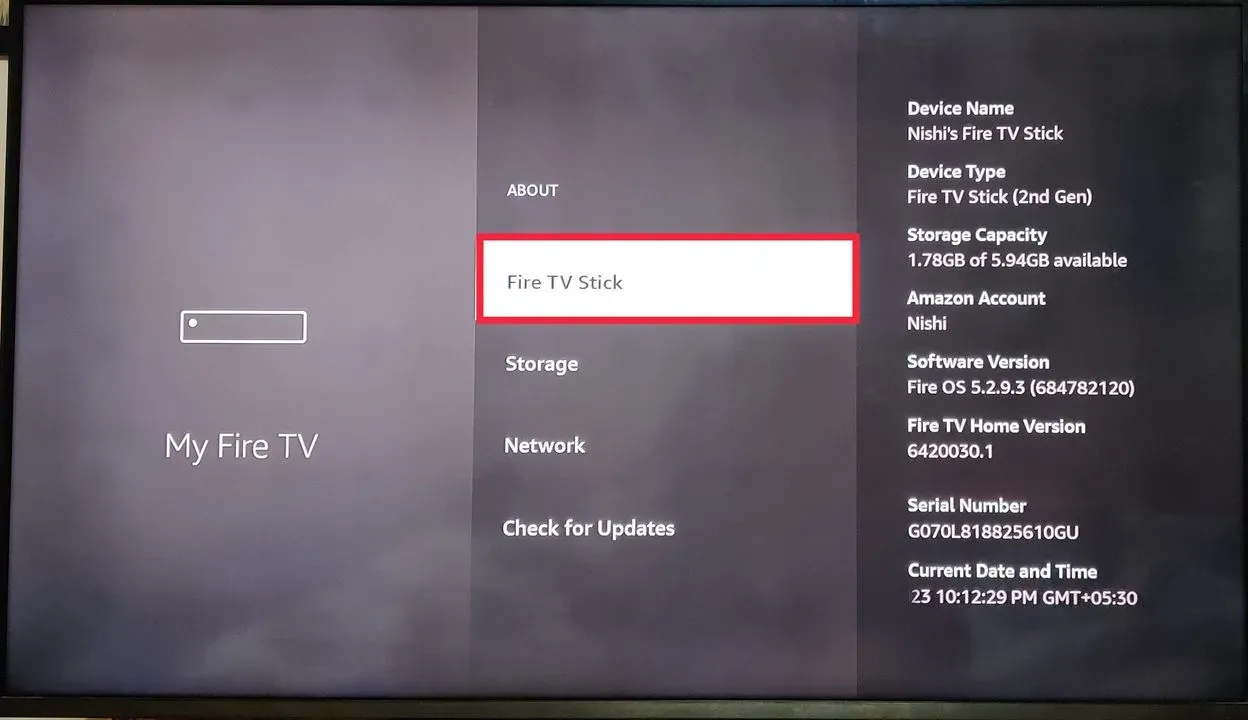
Select “About” from the menu options on your screen.
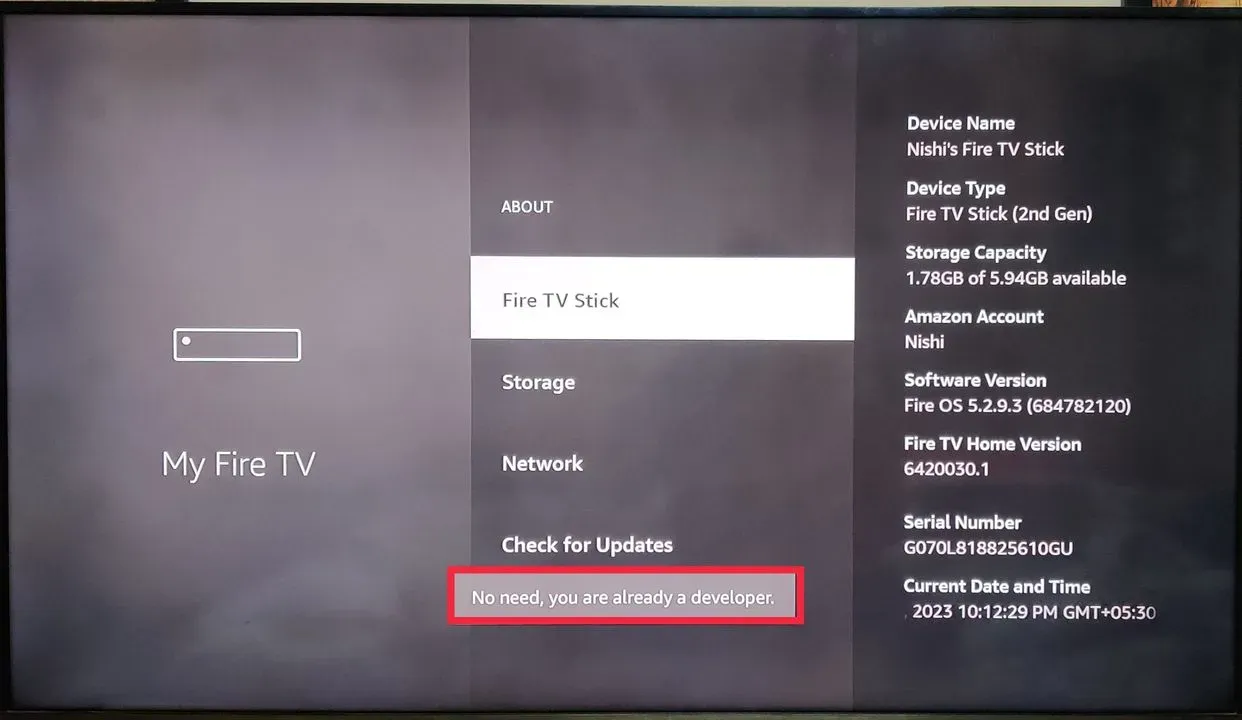
Step 5 : Select “Fire TV Stick” and click it “7” times
You should now be able to see various options. Scroll down to “Fire TV Stick” and press “Okay” 7 times on your Fire TV remote.
Step 6 : Pop-Up Notification
Once you’ve pressed the okay button about 3 times, you will also see a pop-up message on your screen saying
“You are now 4 steps away from being a developer”
Continue clicking okay for a few times before you see another pop-up saying
“No need, you already are a developer”
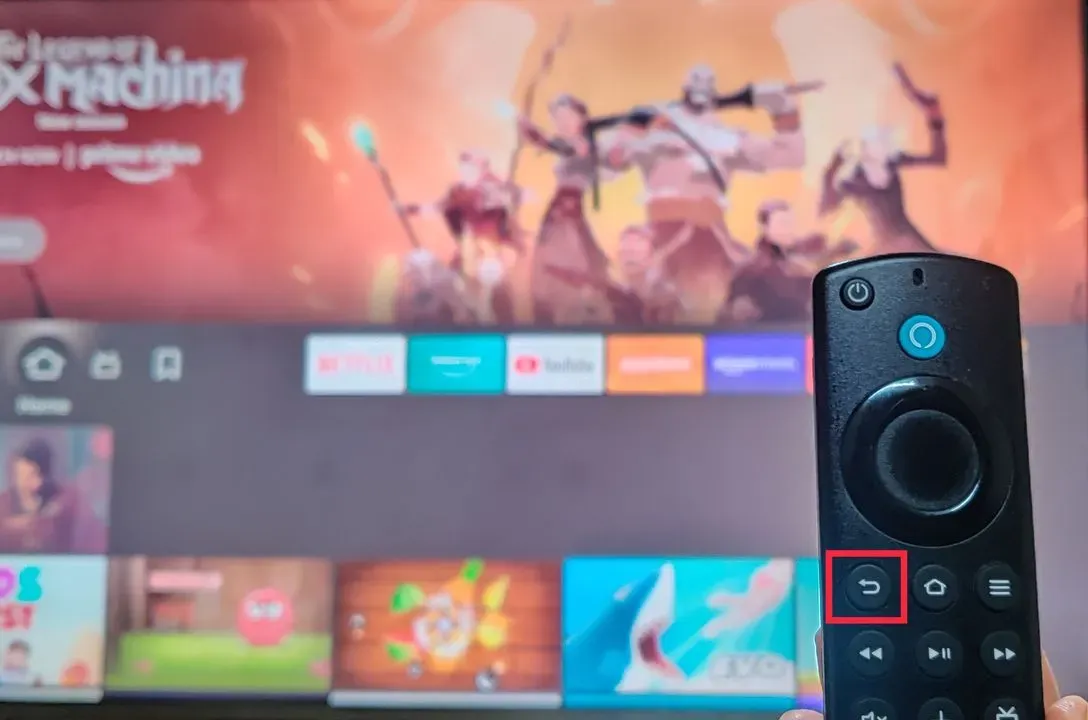
Step 7 : Press “Back” button on the Fire TV Remote
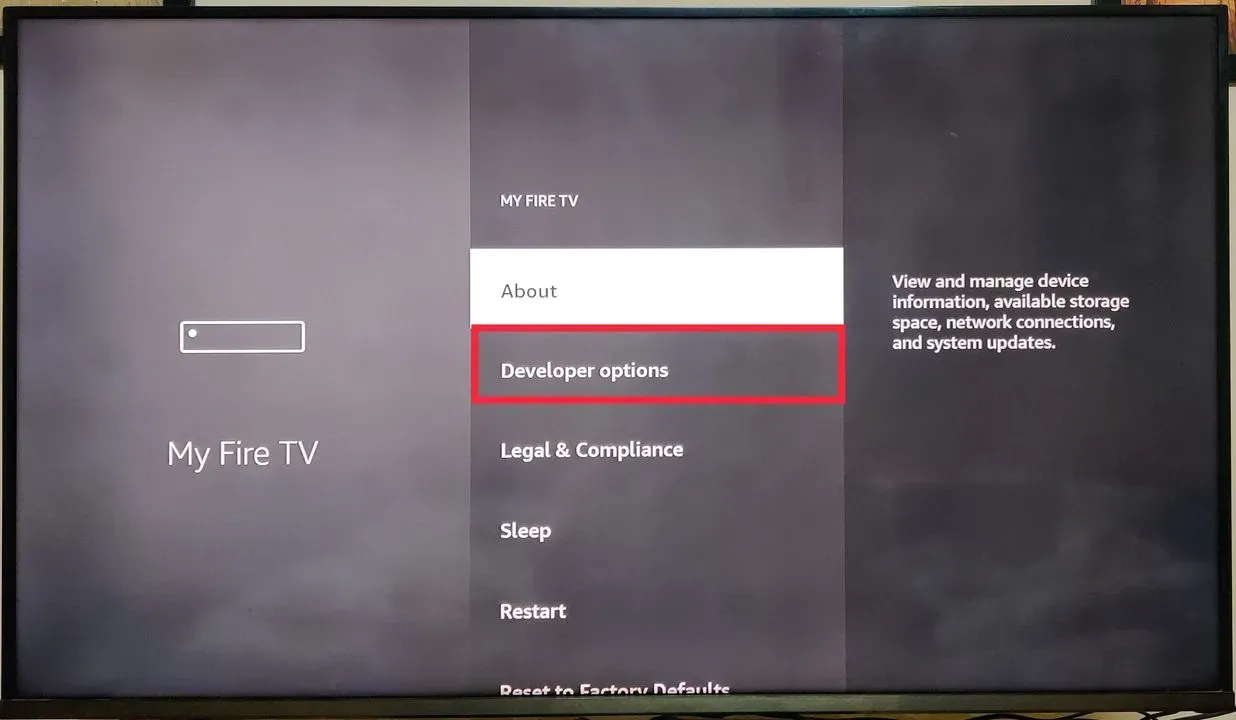
The next step is to go back to the previous menu by clicking the “back” button on your Fire TV Remote. You should now be able to see “Developer options” right below the “About” tab.
Step 8 : Access the “Developer Options” from the options displayed
Scroll down to “Developer options” and click the “Okay” button on your Fire TV remote.
Step 9 : Choose “ADB debugging” option
Once you access the Developer options, you will be able to navigate through two setting options. Select “ADB debugging” and click on it.
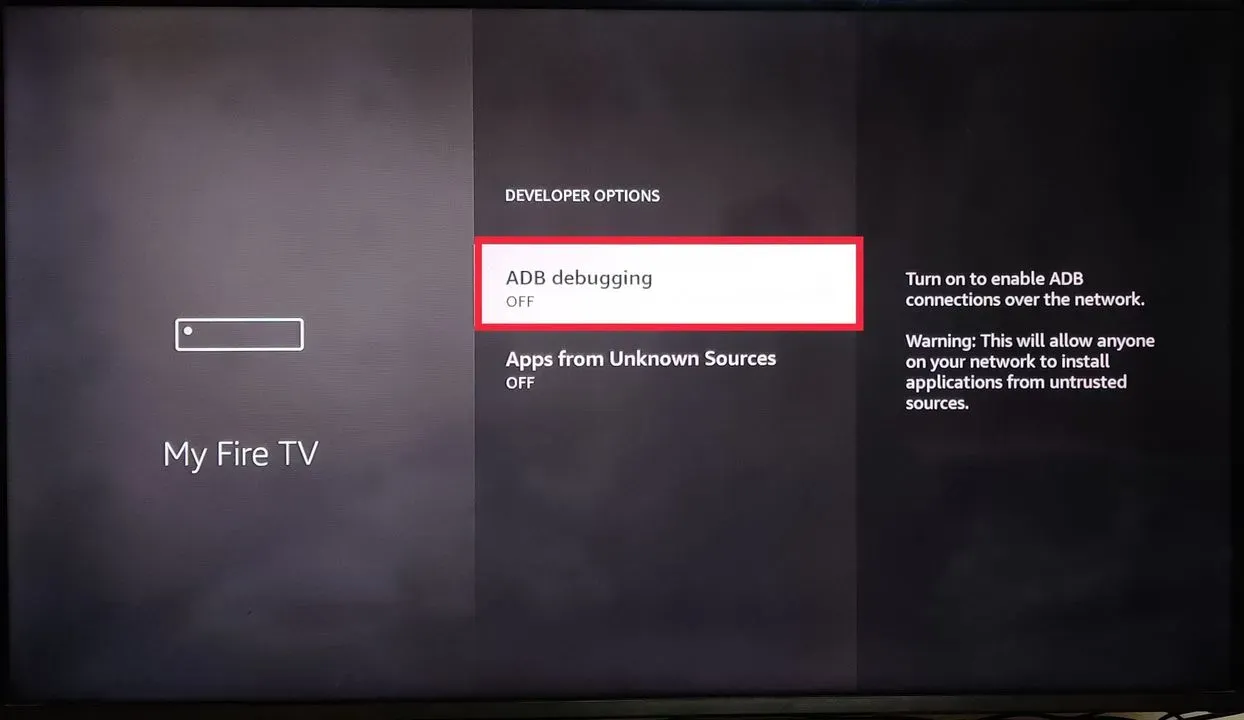
Step 10 : ADB debugging is now “ON” on your Fire Stick
Once you click on the “ADB debugging” tab, it switches to “ON” automatically. “ADB debugging is now enabled on your Fire TV Stick
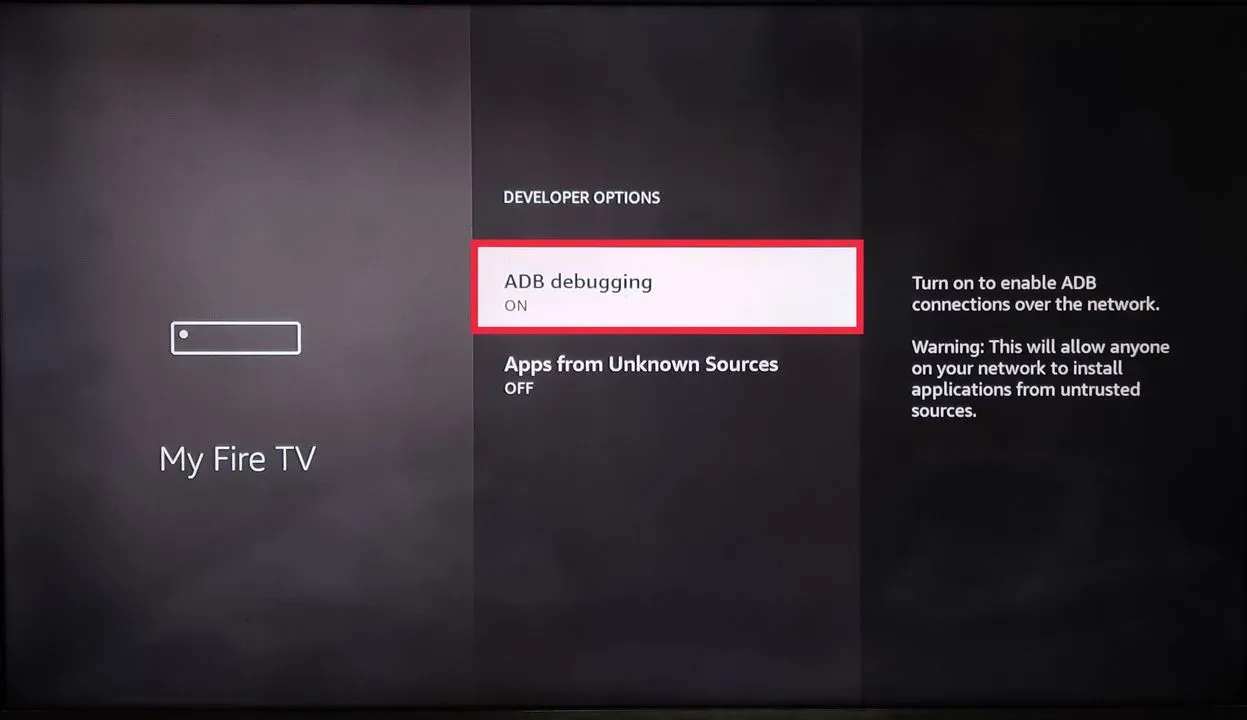
It’s important to note that enabling ADB debugging on a Fire Stick may expose the device to security risks, so it’s essential to only use ADB commands from trusted sources and be sure to disable ADB debugging when you’re done using it. Additionally, enabling ADB debugging on a Fire Stick may also void the device’s warranty, so proceed at your own risk.
Conclusion :
ADB (Android Debug Bridge) debugging is a feature that allows developers and advanced users to remotely access and control an Android device, such as a Fire Stick, from a computer. With ADB debugging enabled, developers can use a variety of ADB commands to access the device’s system and apps, install custom apps, troubleshoot issues, and access advanced settings.
Even though Amazon has hidden this feature in their new update, you will be able to access it with the help of this article.

Passionate about tech gadgets, I turned my love into a blogging journey. Specializing in how-to articles, I unravel the intricacies of gadgets, providing step-by-step guides. Join me in exploring the tech universe, where every device holds endless possibilities. Let’s simplify the complexities and enhance your tech experience together.