The Amazon Fire TV Stick is a popular streaming device that allows you to access a variety of content on your TV. which can be changed to something more personal or memorable. The default name is used to identify the device on the network and make it easier for users to set up and connect to their home network. A default name also helps to distinguish between multiple devices, in case a user has more than one Fire TV Stick or other Amazon devices connected to the same network.
This Fire TV Stick name can be changed to something more personal or memorable. Before we begin, let’s first first know that the Fire TV Stick name can not be changed in Amazon Fire Stick itself. However, there are other methods to it. In this article, we will discuss multiple methods to change the name of your Amazon Fire TV Stick.
Method 1. Change Name on Website
Your Fire Stick name can be changed by accessing the Amazon official website and changing the device name there. To change the name of your Fire TV Stick from the Amazon website, you need to have an Amazon account and have your Fire TV Stick connected to your home network. This can be done in a few simple steps.
Step 1. Note down the default Fire Stick name
Before we begin changing the device name, we need the default device name handy. Follow the steps below to access the device’s default name:
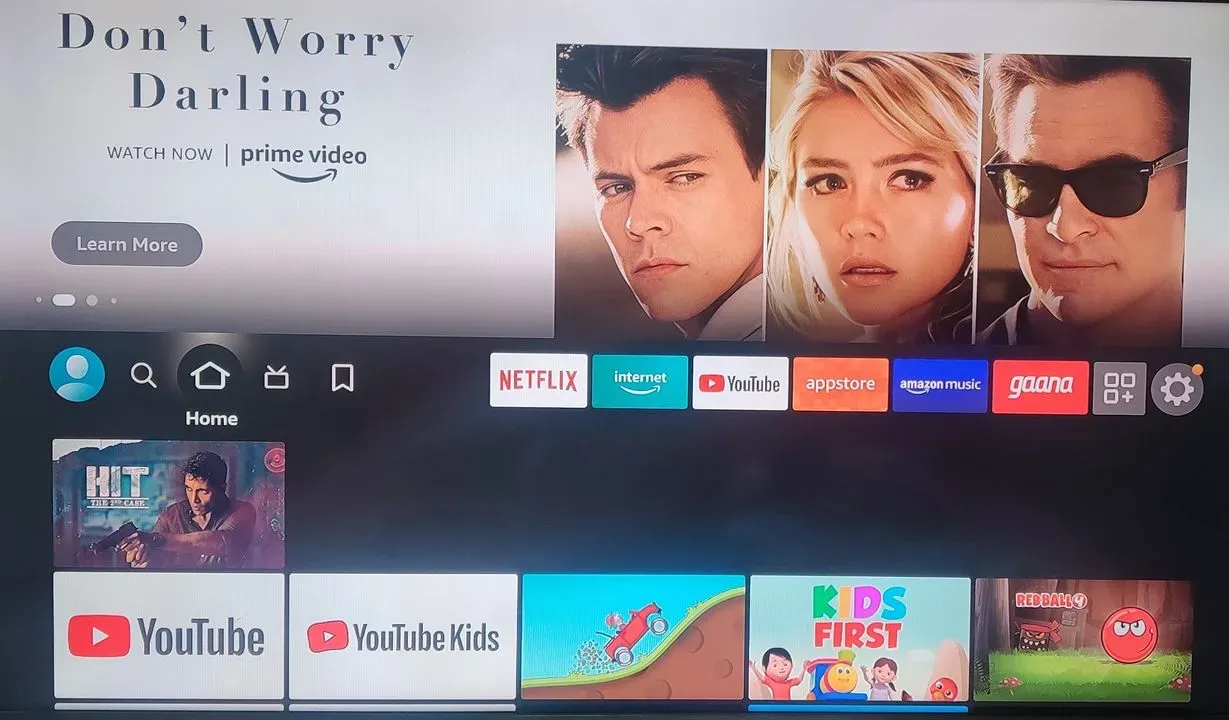
a. Go to “Home”
The very first step to finding out the existing default Fire TV name is to make sure that the device is turned on and go to your device’s home page.
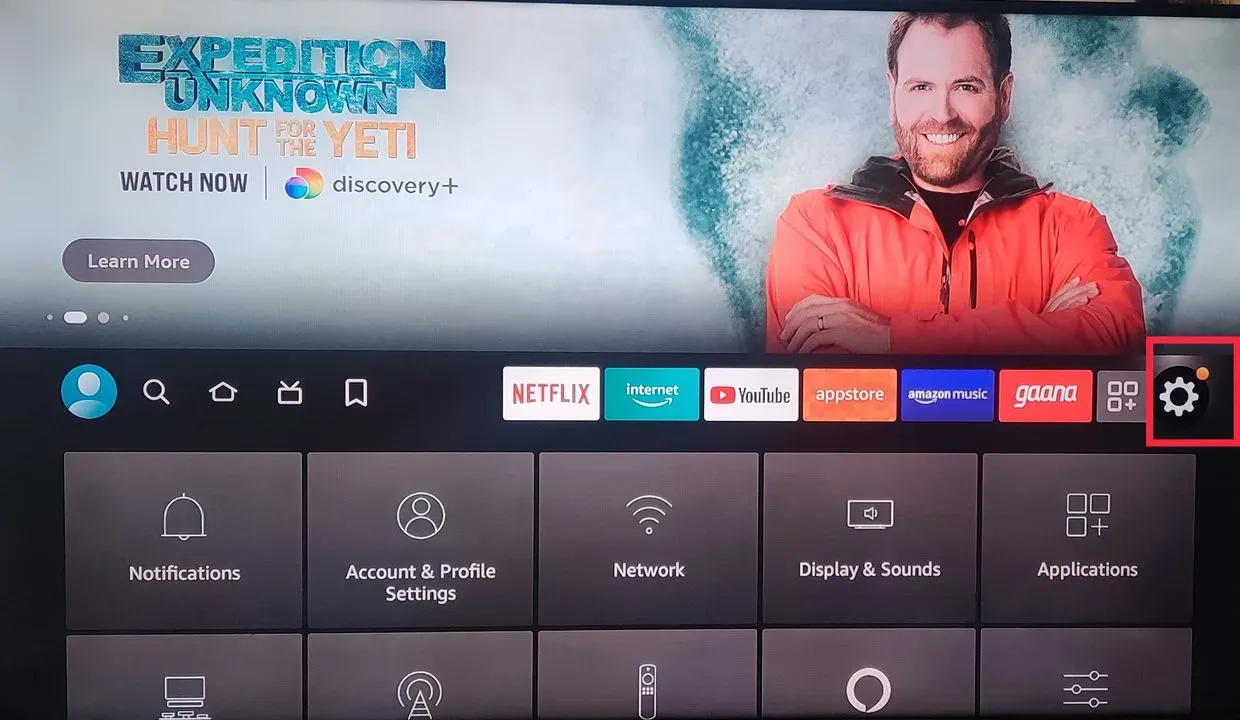
b. Then, Go to “Settings”
The next step is to access the settings icon located at the right of your screen.
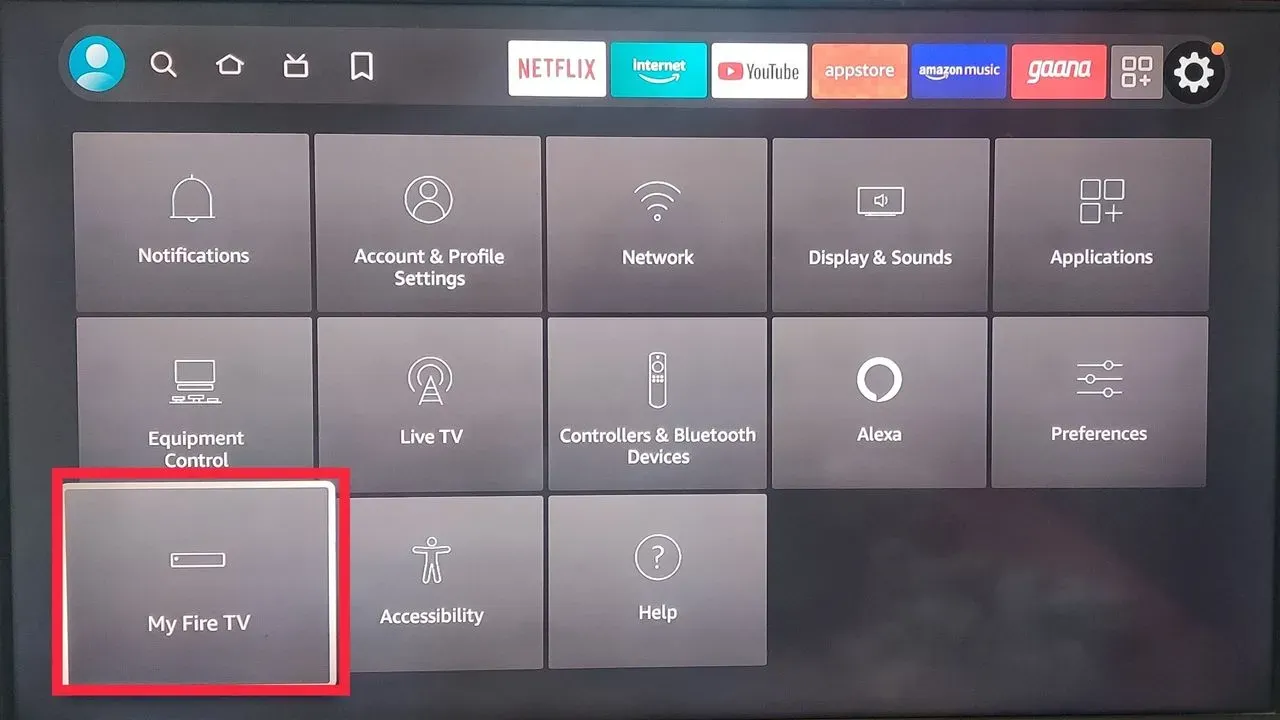
c. Access “My Fire TV”
Once you select the settings tab, you will be exposed to many settings menu options. Scroll down to select “My Fire TV”.
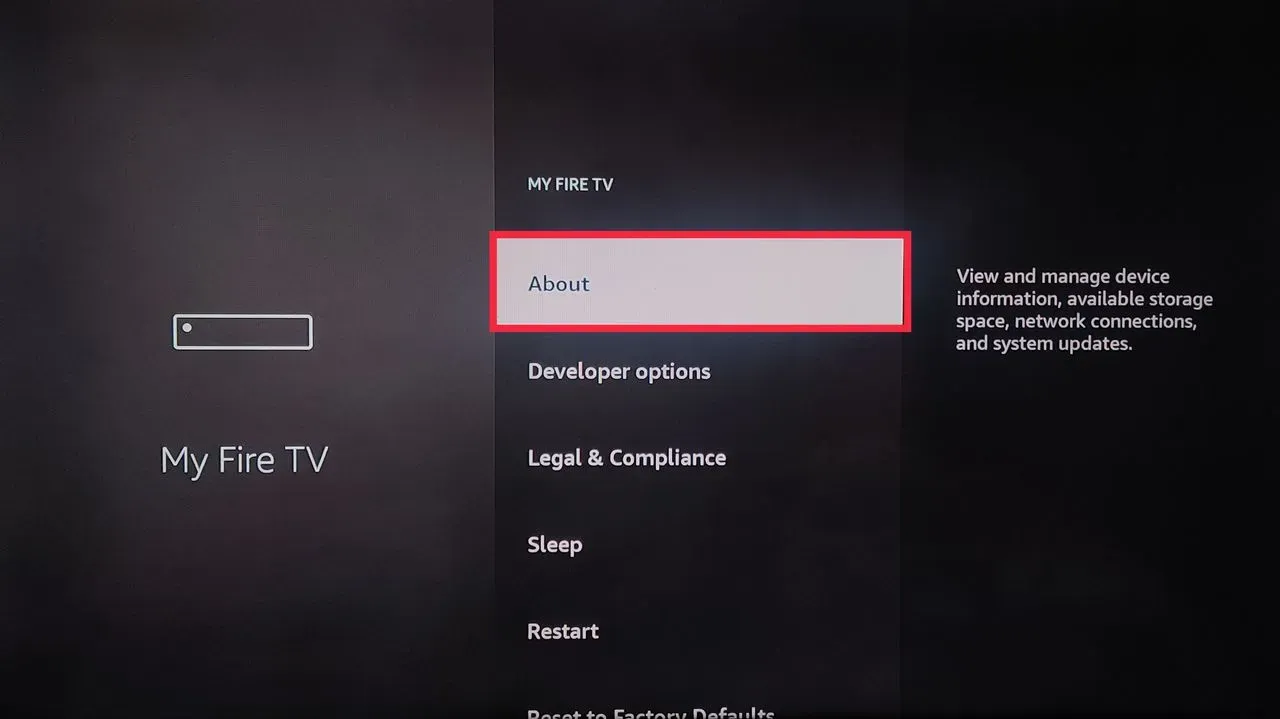
d. Select “About”
Within My Fire TV settings options, select “About”, which should be the very first option displayed on your device screen.
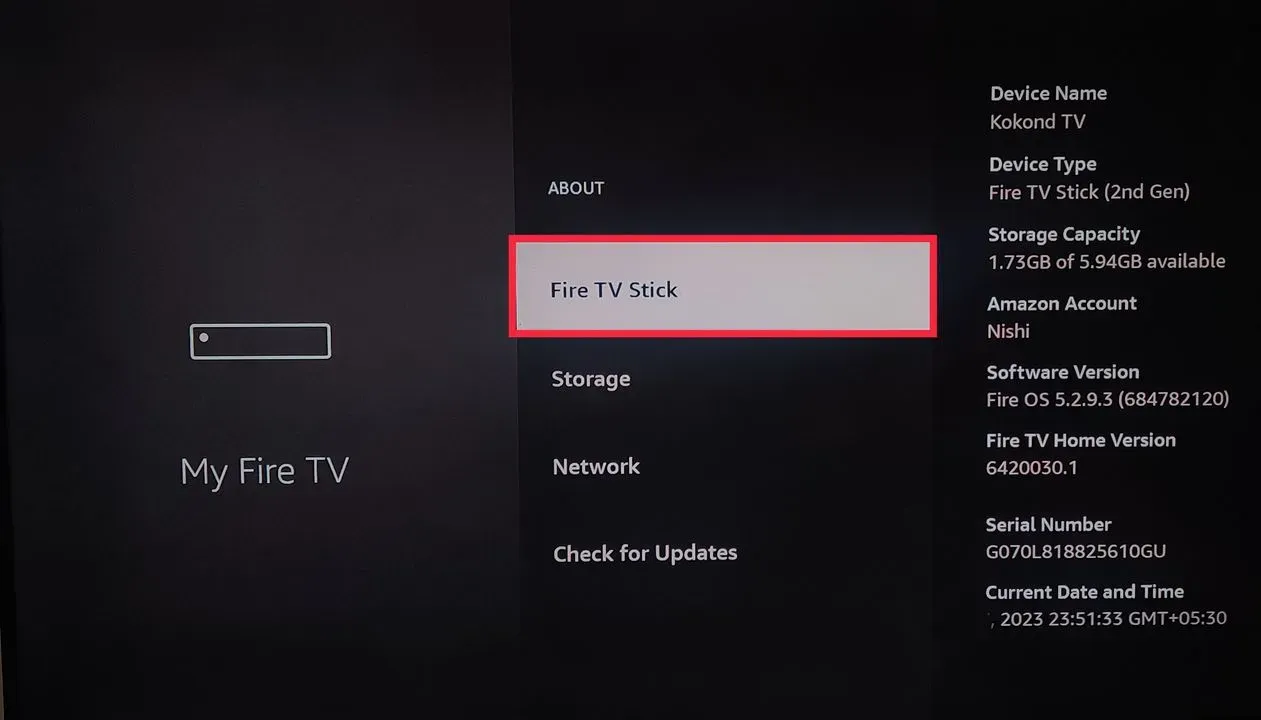
e. Select “Fire TV Stick”
The About tab will further expose you to many options. Select “Fire TV Stick”. As the cursor moves to Fire TV Stick, you should see important information related to your Fire TV Stick on the right bar of your device screen.
f. Note the Fire Stick name
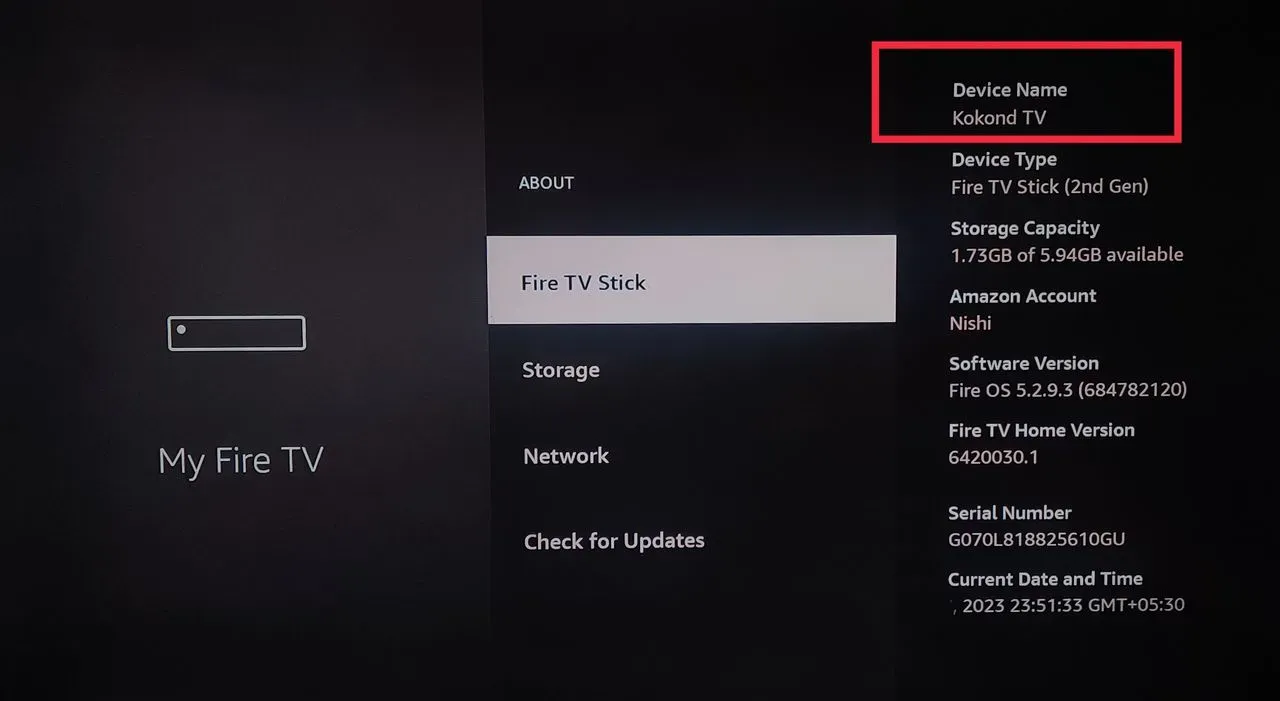
Now that you see your device’s information, note down your Fire Stick name. You will later be needing that.
Step 2. Go to your browser and access Amazon.com
The next step is to access Amazon’s official website. Go to any of your browsers and type Amazon.com in the search bar. Once you do that, you will reach Amazon’s website page.
Step 3. Sign in to your Amazon account
Once you arrive at Amazon’s official webpage, you will be able to navigate and find the “Hello, Sign in” tab on the top right corner. Select that and sign in to your Amazon account when prompted.
Step 4: Go to “Manage your Content and Devices”
Once you have successfully logged into your Amazon account. Hold your cursor at “Account & Lists” located just below your name. Scroll down to select “Manage your Content and Devices” from the drop down.
Step 5: Select “Devices”
Selecting “Manage your content and devices” will take you straight to all the settings options related to your Fire TV Stick. Select “Devices” from the top bar.
Step 6: Select “Fire TV”
When you access “Devices” you will be able to see your devices. Select “Fire TV” from the devices mentioned and click on it.
Step 7: Click on you Fire TV Stick name
Selecting “Fire TV” will then show you your Fire TV Sticks name.
If you have more than 1 Fire TV Sticks connected to your Fire TV. Multiple options will be shown on your screen. You need to select your Fire TV Stick name. This is where noting your Fire Stick name will come handy.
Select the Fire TV Stick name that you wish to change by clicking on it.
Step 8: Hit “Edit” next to your Fire TV Stick name
When you click on your Fire TV Stick name, you will be directed to your device summary. Here, you will also be able to see the “Edit” tab beside your Fire TV Stick name. Click on “Edit”.
Step 9: Type the new name and click “Save”
You shall now see a pop up message box on your screen saying:
“You can tell your devices apart by giving each one a unique name.”
Now, type in the new Fire TV Stick name that you wish to change to in the box given next to “Device Name”. Once done, click “Save”.
Step 10: Your Fire TV stick name is changed
Your Fire TV Stick name should now have successfully changed now.
Method 2. Change Name on Amazon Mobile App
The next method is to change the current name of your Fire TV Stick through Amazon’s mobile app. This method is much easier and convenient because most of us are more comfortable with our mobile phones. It is also the quickest way to change Fire TV Stick name. For this step you will need to keep the Amazon mobile app downloaded and installed in your mobile device. Also, make sure your account is signed in.
Step 1. Note down the default Fire Stick name
Follow the steps below to make a note of the Fire TV Stick name that you want to change.
Home > Settings > My Fire Tv > About > Fire TV Stick
Note down the current name of your Fire TV Stick.
Step 2. Go to Amazon App
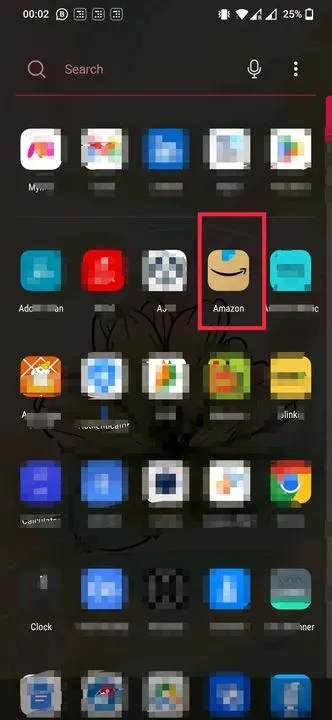
Scroll through your mobile device to find the Amazon mobile app. And click on it to access it.
Step 3. Select “Menu” option
On the right most corner of the bottom bar on the Amazon mobile app, hit the three horizontal lines to access the menu options.
_1280x720.webp)
Step 4: Access “Account”
Clicking on the three horizontal lines will expose you to a few menu options. Select “Account”.
_1280x720.webp)
Step 5: Select “Content and Devices”
Once you access Account, you will further be exposed to a number of menu options. Scroll down and click on “Content and devices”.
_1280x720.webp)
Step 6: Select “Devices”
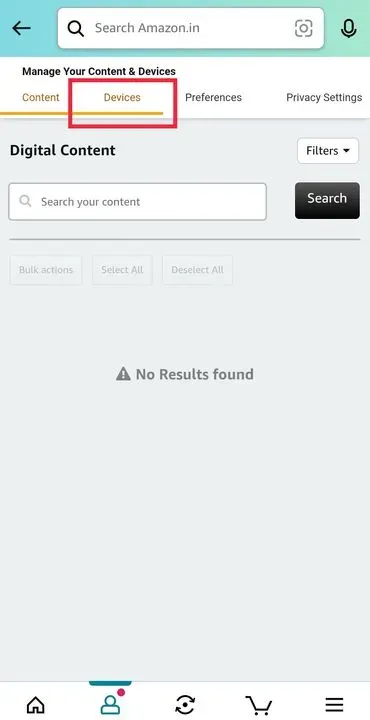
Content and devices option will then open up information related to your device and will have Content selected by default. Scroll right and select “Devices” from the top bar.
Step 7: Access “Fire TV”
You should now be able to see the “Fire TV” devices on your mobile screen that are connected to your Amazon account. Select “Fire TV” to access your Fire TV Stick.
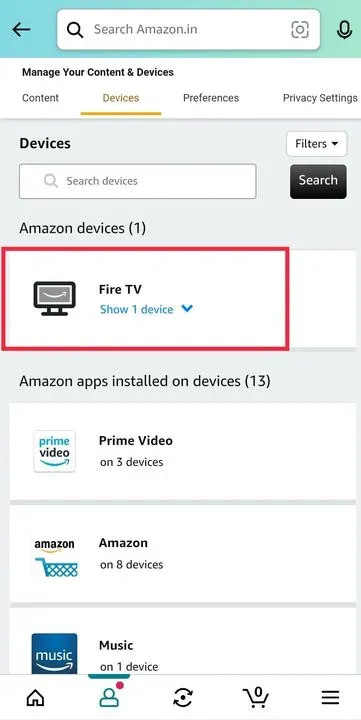
Step 8: Choose your Fire Stick name
At this point, you should be able to find your Fire TV Stick name.
If you have more than 1 Fire TV Sticks connected to your Fire TV. Multiple options will be shown on your screen. You need to select your Fire TV Stick name. This is where noting your Fire Stick name will come handy.
Select the Fire TV Stick name that you wish to change by pressing it.
_1280x720.webp)
Step 9: Press “Edit”
Once you find your Fire TV Stick name and select it, you will be able to see the “Edit” link in blue.
Press edit to feed the new name.
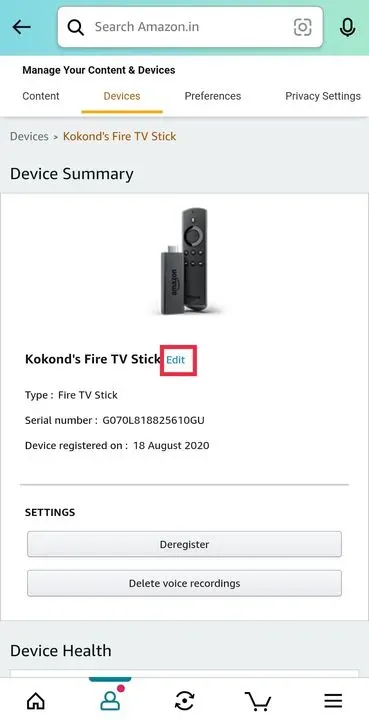
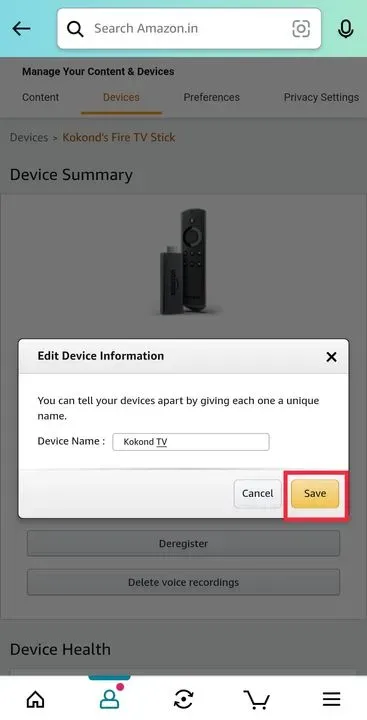
Step 10: Type the new Fire TV Stick name
You shall now see a pop up message box on your screen saying:
“You can tell your devices apart by giving each one a unique name.”
Now, type in the new Fire TV Stick name that you wish to change to in the box given next to “Device Name”. Once done, click “Save”.
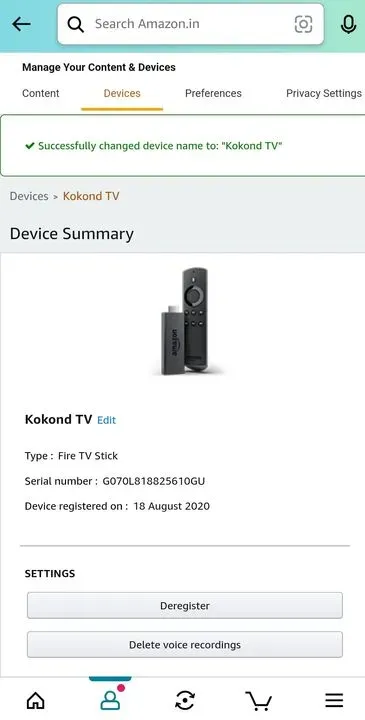
Step 11: Your Fire TV Stick name has been updated
Your Fire TV Stick name should now have changed. If you now go back to your Fire TV Stick device, you should now be able to see the new name of your Fire TV Stick.
Conclusion:
To conclude, there are a number of ways to personalize your Fire TV Stick name to a name of your choice. After all, we all appreciate customizations. Your Fire TV Stick will have a default name of its own. However, changing it is possible. Changing the name of your Fire TV device is a simple and straightforward process that can be done in just a few steps. This article gives you two methods to change your Fire TV Stick name. Whether you choose to change it on Amazon’s official website or the app, one thing is sure that by giving your device a unique name, you can make it easier to identify and connect to and ensure a better streaming experience.

Passionate about tech gadgets, I turned my love into a blogging journey. Specializing in how-to articles, I unravel the intricacies of gadgets, providing step-by-step guides. Join me in exploring the tech universe, where every device holds endless possibilities. Let’s simplify the complexities and enhance your tech experience together.